Microphones for Home Podcast: A Complete Guide to the Top-8 Models for Serious Creators
A good podcast mic does more than “sound clear”—it makes your voice feel closer, more confident, and easier to listen to for long stretches. Today’s best home-podcast microphones are quieter, more forgiving in untreated rooms, and more workflow-friendly than ever, with smarter USB integration, better onboard controls, and broadcast-style voicing that flatters speech.
Whether you’re recording interviews, running a solo show, streaming live, or building a “one mic does it all” setup, the right microphone can instantly raise your production quality—without forcing you into constant tweaking.
Helping Podcasters Sound Better (Not Harder): Useful Tips
Pick the right mic type for your room.
- Untreated room / noisy space → dynamic mics usually reject more background noise.
- Treated room / quiet space → condenser mics can sound more open and detailed.
Decide: USB-first or XLR-first.
- USB mics are fast: plug in, record.
- XLR mics scale: better preamps/interfaces, easier upgrades, pro routing.
Prioritize monitoring and mute.
A headphone jack for zero-latency monitoring and a reliable mute control can save takes—especially on live shows.
Work the mic distance.
Most “pro podcast sound” is technique: stay consistent (often 2–6 inches), use a pop filter/windscreen, and keep your mouth slightly off-axis to reduce plosives.
Main Advantages of Great Podcast Microphones
More intelligible speech.
Better capsules and tuning make words clearer—less “mud,” less harshness.
Cleaner recordings in real homes.
Good polar patterns and noise rejection help in bedrooms, offices, and shared spaces.
Faster workflow.
Onboard gain, mute, monitoring, and DSP reduce the need for constant software fixes.
Long-term value.
A solid mic stays useful for years—especially hybrid models that can grow from USB to XLR rigs.
Top-8 Microphones for Home Podcast Worth Considering — From Plug-and-Play USB to Broadcast XLR
1) Shure MV7+ (USB/XLR)

A modern “broadcast-style” dynamic mic built for podcasters who want fast setup and a clean upgrade path into XLR later.
Pros:
- Dual USB/XLR flexibility for beginners and upgrade-minded creators
- Speech-friendly voicing with helpful DSP/app control
- Strong choice for typical home rooms (dynamic rejection)
Cons:
- Costs more than entry USB mics
- You’ll get the most from it if you learn basic gain/positioning
If you want a “one mic that grows with your setup,” this is one of the safest bets in podcasting.
MV7+ is built around a close-mic workflow: it’s designed to be used fairly near your mouth, which helps your voice stay forward while reducing room sound. On the USB side, Shure emphasizes an updated feature set with USB-C, improved Auto Level Mode, and DSP tools like a digital pop filter and real-time denoiser, plus a customizable LED touch panel that also supports touch-to-mute.
For “hybrid creators” who bounce between solo recording and streaming, this is a big deal: you can keep a consistent chain without loading plugins every session. When you later move to XLR, you keep the same microphone and change only the interface.
Quick setup tip: start 3–5 inches away, slightly off-axis, and let the Auto Level/denoiser do light cleanup—not heavy “fixing.”
To buy this product, click here.
2) RØDE PodMic USB (USB-C/XLR)

The PodMic USB takes the classic PodMic idea and turns it into a true hybrid: USB and XLR in one mic, designed specifically for broadcast-style voice capture.
Pros:
- Dual USB-C + XLR connectivity in one mic
- Built-in DSP support and creator-focused software ecosystem
- Dynamic capsule helps reduce room noise for many home setups
Cons:
- Heavier “broadcast” form factor (best on a boom arm)
- Not the airiest option if you prefer bright condenser detail
This is a strong “podcast-first” microphone—especially if you want USB convenience now and XLR later.
RØDE positions PodMic USB as a dynamic broadcast mic that can plug into computers and even phones via USB, while still offering XLR for mixers/interfaces.
On the digital side, many listings and docs highlight 24-bit / 48 kHz operation, onboard DSP with APHEX processing, a built-in headphone output for zero-latency monitoring, and a high-gain internal preamp design (RØDE’s Revolution Preamp concept) to keep the signal clean without cranking noisy gain in software.
It’s also very “podcast practical”: internal pop filtering/shock reduction plus a mount made for stable positioning—so you can park it on a boom arm and forget about it.
Quick setup tip: if your voice sounds too “chesty,” back off an inch and angle the capsule slightly past your mouth; dynamics change a lot with distance.
To buy this product, click here.
3) Shure SM7B (XLR)

A legendary studio/broadcast dynamic microphone that’s become a default “pro podcast” reference—warm, controlled, and forgiving when used correctly.
Pros:
- Classic broadcast tone that flatters many voices
- Excellent off-axis rejection (helpful in real rooms)
- Long-term, studio-grade durability
Cons:
- Needs a good interface/preamp (often lots of clean gain)
- XLR-only: not the fastest plug-and-play path
If you’re building a serious recording chain and want that “finished” voice sound, this remains a cornerstone choice.
The SM7B is famous for two things: a smooth, “radio-ready” vocal capture—and the fact that it typically needs a lot of clean gain. Shure explicitly notes that it operates best with preamps capable of around +60 dB of gain, and that its sensitivity means many entry-level preamps may struggle without an inline booster.
That isn’t a downside if you plan for it (a solid interface, or an inline gain device, plus good cabling). In exchange, you get a mic that can sound extremely controlled even in imperfect rooms, especially when you’re consistent with distance and plosive control.
Quick setup tip: treat it like a “close mic.” Stay near the windscreen, speak slightly off-axis, and keep your gain staging clean to avoid hiss.
To buy this product, click here.
4) Samson Q2U (USB/XLR)

One of the best-value entry points into quality podcasting because it offers both USB and XLR, plus practical creator features like onboard monitoring.
Pros:
- Dual USB/XLR for a very accessible price tier
- Headphone monitoring + simple controls for beginners
- Dynamic design helps in untreated rooms
Cons:
- Not as “polished” as premium broadcast dynamics
- Accessories vary by bundle; plan for a decent stand/arm
If you’re starting a home podcast and want flexibility without overspending, Q2U is a practical workhorse.
Samson lists the Q2U as a cardioid dynamic mic with USB-C digital output plus XLR, and a built-in 3.5 mm headphone output for monitoring—exactly the features that prevent early frustration (latency, clipping, and inconsistent levels).
Key published specs include 50 Hz–15 kHz frequency response, up to 16-bit recording, and 44.1/48 kHz sample rates on USB.
In practice, this mic rewards solid technique: keep it close, keep the gain moderate, and you’ll get surprisingly “broadcasty” results for the money—especially compared to cheap condensers that amplify every room reflection.
Quick setup tip: use it 2–4 inches away and aim the “front” directly at your mouth; cardioid dynamics lose clarity quickly if you drift off to the side.
To buy this product, click here.
5) Audio-Technica AT2020USB-X (USB-C)

A creator-friendly condenser microphone built to deliver clear, natural detail over USB-C.
Pros:
- Clean condenser clarity (great for articulate speech)
- Cardioid focus helps keep attention on your voice
- High-resolution USB audio support
Cons:
- Condensers hear more room sound (treatment/positioning matters)
- Not ideal if your space is noisy or reflective
If your room is reasonably quiet—or you can treat it a bit—this can sound very “studio” with minimal fuss.
Audio-Technica highlights a built-in headphone jack with volume control for no-delay monitoring, plus a mix control to blend mic audio with computer playback—useful for remote interviews, listening to a co-host, or tracking music beds without echo/latency headaches. It also includes a touch-sensitive mute on the mic.
As a condenser, it’s great at pulling out vocal detail and intelligibility, but it will also “report” your room—so pairing it with a boom arm, getting it closer to your mouth, and adding soft furnishings (curtains/rug) can be a bigger upgrade than any EQ plugin.
Quick setup tip: use it closer than you think (about 4–6 inches) and reduce your input gain; closer distance = less room in the recording.
To buy this product, click here.
6) Elgato Wave:3 (USB-C)

A popular podcast/stream mic with a strong desktop workflow: onboard controls, monitoring, and high-resolution conversion.
Pros:
- High-resolution conversion for detailed capture
- Cardioid focus + monitoring features for clean recordings
- Great fit if you also stream and want a tidy desk setup
Cons:
- Condenser sensitivity can pick up room reflections
- Best results often come with a boom arm and good mic technique
If your workflow involves streaming, live mixing, or quick on-desk recording, Wave:3 is a very convenient “creator station” mic.
Elgato’s published technical specs list a 17 mm electret capsule, cardioid pattern, 24-bit resolution, and 48/96 kHz sample rates, plus a 3.5 mm headphone port for monitoring.
Elgato also emphasizes its “broadcast-grade” approach (hardware designed to keep detail clean) and a creator workflow with on-mic controls and a streamlined USB-C connection.
If you record and stream, this kind of “all-in-one” desk mic is about speed: quick mute, quick level adjustment, and consistent repeatable sound without rebuilding sessions.
Quick setup tip: keep it off your desk if possible (boom arm), or at least avoid typing directly in front of it—desk vibrations are a common “why does my audio sound cheap?” problem.
To buy this product, click here.
7) Logitech Blue Yeti (USB)

A long-running USB favorite because it’s easy, flexible, and multi-pattern—useful for solo voice, interviews, or small group setups.
Pros:
- Multiple pickup patterns for different recording styles
- Very plug-and-play for beginners
- Helpful software processing options
Cons:
- Condenser + desktop placement can capture room/desk noise
- Often benefits from a shock mount/arm and careful positioning
If you want versatility for different formats (solo, two-person, roundtable), this is still a strong “starter-to-intermediate” pick.
Logitech lists Yeti as using three 14 mm condenser capsules and offering four polar patterns (cardioid, bidirectional, omnidirectional, stereo), which is why it can cover solo narration, two-person interviews, or even small-group capture in a pinch.
Specs commonly published include 48 kHz / 16-bit recording, a headphone output for latency-free monitoring, plus on-mic controls like gain and mute—exactly what beginners need when they’re learning levels and mic distance.
The tradeoff is placement: it’s often used on a desk stand, which makes it more likely to pick up keyboard/desk noise and room reflections. Put it on an arm and keep it closer, and it typically improves a lot.
Quick setup tip: for podcasts, stay in cardioid mode, keep the front of the mic aimed at you, and get it closer than “across the desk.”
To buy this product, click here.
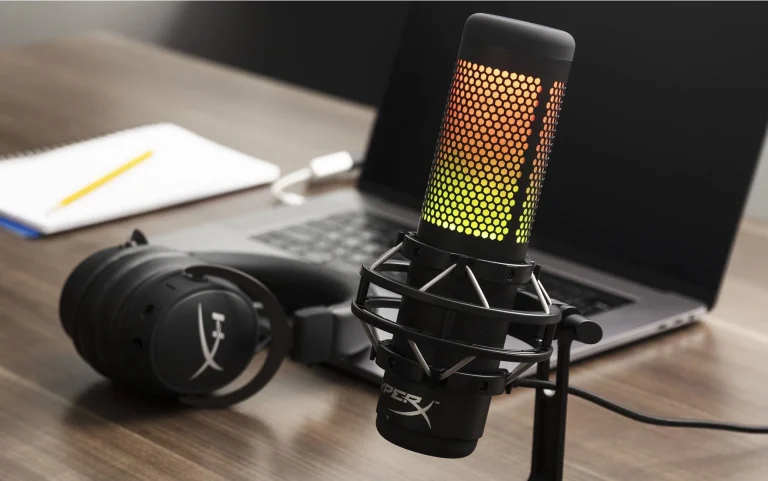
8) HyperX QuadCast S (USB)

A feature-rich USB condenser mic with strong usability for home creators: multiple polar patterns, tap-to-mute, and included shock mounting.
Pros:
- Multiple polar patterns for flexible recording
- Tap-to-mute and included shock mount/pop filtering features
- Great for creators who want quick controls on the mic
Cons:
- Condenser sensitivity means your room still matters
- Some users will prefer a more neutral “broadcast” tone
If you’re recording at home and want an all-in-one package with easy controls, it’s a very convenient option.
HyperX highlights four selectable polar patterns, a tap-to-mute top control, an LED status indicator so you can see mute state instantly, and a gain control dial for quick sensitivity changes.
That control layout is the real feature: when you’re live or recording, fewer software clicks = fewer mistakes. The included mounting hardware is also meant to fit common stand threads, which makes upgrading to a boom arm straightforward.
As a condenser, it can sound crisp and present—but it will also pick up more room than a dynamic, so distance and placement matter.
Quick setup tip: use the included mount, keep it off your keyboard line, and speak slightly off-axis to reduce plosives (even with built-in filtering).
To buy this product, click here.
How to Choose the Right Home Podcast Microphone
Start with your room reality.
Untreated and noisy → dynamic (MV7+, PodMic USB, Q2U, SM7B)
Quiet/treated → condenser clarity (AT2020USB-X, Wave:3, Yeti, QuadCast S)
Then choose your connection path.
USB-only simplicity → Wave:3, AT2020USB-X, Yeti, QuadCast S
USB + XLR flexibility → MV7+, PodMic USB, Q2U
XLR “broadcast chain” → SM7B
Finally, pick based on workflow tolerance.
If you want instant results, prioritize simple controls + monitoring. If you love upgrading gear, prioritize XLR compatibility and scaling.
Frequently Asked Questions
Dynamic or condenser for home podcasting?
Dynamic is often easier in real bedrooms/offices; condenser can sound more detailed but hears more of the room.
Do I need an audio interface?
Only if you go XLR. USB mics don’t require one.
What matters more: mic or room?
Both—but improving mic technique (distance, pop control, consistent placement) is the fastest win.
Conclusion
A great home podcast mic isn’t just about “better sound”—it’s about confidence, consistency, and recordings that feel professional without exhausting your workflow. Choose the microphone that matches your room, your setup style (USB vs XLR), and the way you actually record—and your audience will hear the upgrade immediately.